Setting up streaming from scratch is a simple sequence: choose a device, connect it, sort your network, set up accounts, configure quality and sound, add subtitles, optionally add a VPN, then test. This is the master checklist — every step linked to a detailed guide, so you can go as deep as you need. Bookmark it as your start-to-finish reference for a setup that just works.
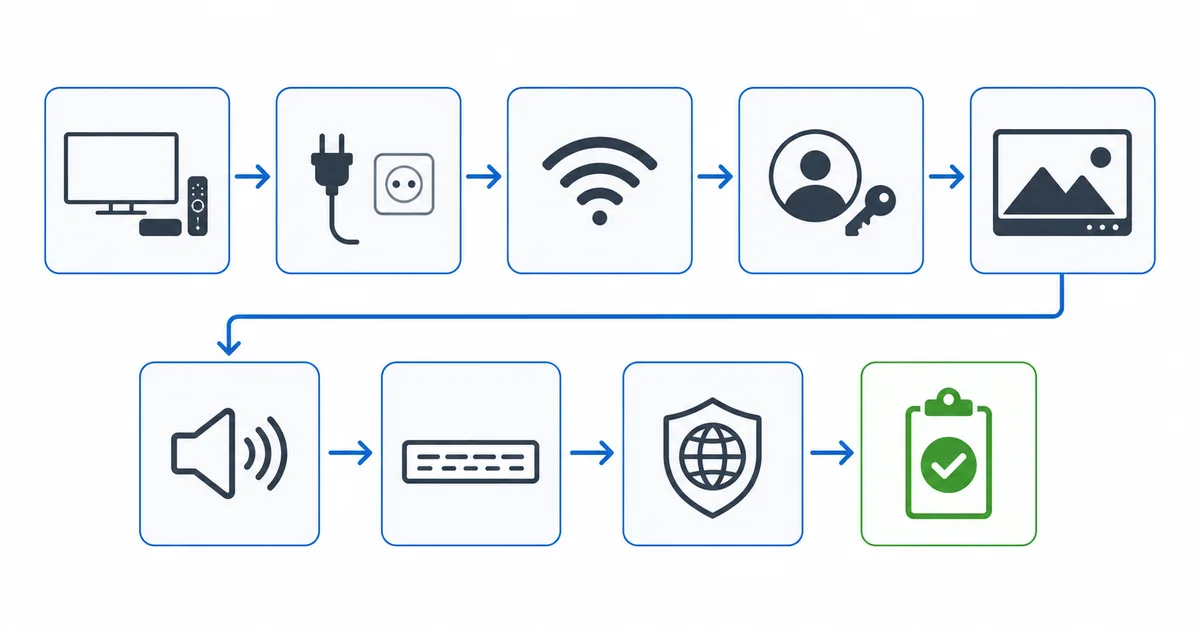
Step 1: Choose Your Device
Pick a streaming device to match your TV and budget:
- Overall value: Fire TV Stick 4K Max — see the best streaming devices guide.
- Premium / home cinema: Apple TV 4K or NVIDIA Shield.
- Budget / second TV: best device under €50 or our bedroom setup.
- By budget: setup under €100 · under €300.
- Not sure smart TV vs device? See smart TV vs streaming device.
Step 2: Connect It
- Plug into an HDMI port that supports 4K/HDCP 2.2 — see HDMI versions.
- Use a High Speed / Ultra High Speed HDMI cable for 4K/HDR.
- If picture fails, see fix black screen (HDCP).
Step 3: Sort the Network
- Check you have enough internet speed (≈ 25 Mbps per 4K stream).
- Prefer wired Ethernet over Wi-Fi where possible.
- Weak signal? See fix weak Wi-Fi; won’t connect? fix not connecting to Wi-Fi.
Step 4: Set Up Accounts & Subscriptions
- Start with the free layer: your public broadcaster and FAST channels.
- Add a paid core: Netflix, Disney+, Prime Video or Apple TV+ — compare in Netflix vs Disney+ vs Prime.
- Keep costs down: save on streaming, ad tiers, rotate subscriptions, and set a budget.
- In your country: find local services in your country guide.
Step 5: Configure Picture Quality
- Set the device output to 2160p and the app to highest quality.
- Enable the TV input’s enhanced/full-colour mode for HDR.
- 4K not working? fix 4K. HDR dull? fix HDR washed out.
Step 6: Sort the Sound
- Set audio to your setup — PCM/Stereo for TV speakers, Dolby Atmos via eARC for a soundbar/receiver; see streaming audio formats.
- No sound? fix no sound. Lip-sync off? fix audio/video sync.
- Building a cinema? home theatre setup.
Step 7: Add Subtitles
- Turn on and size subtitles in subtitles setup; not showing? fix subtitles not showing.
Step 8: VPN (Optional)
- For privacy on public Wi-Fi, add a VPN for streaming — it’s optional and not for unblocking. Travelling? travel streaming guide.
Step 9: Test Everything
- Play a 4K title — confirm full quality, no buffering.
- Check sound and subtitles, and test at a busy time.
- Anything wrong? The streaming troubleshooting checklist points to every fix.
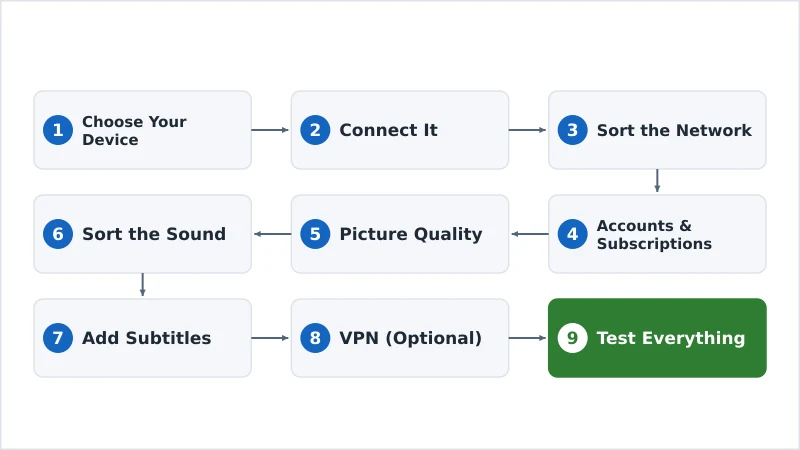
The Bottom Line
A great streaming setup is built in order: device → connection → network → accounts → picture → sound → subtitles → VPN → test. Get each layer working before the next, and you’ll have a reliable setup that just works — with a detailed guide for every step if you want to go deeper. Setting up for someone else? See our streaming for seniors guide. Keep this checklist bookmarked, fix anything with the troubleshooting checklist, browse every market in the streaming by country page, and look up any term in the streaming glossary.